Climbing season may be on hold as we begin the spring in our homes, but even with the gyms and crags closed down, that doesn’t mean you have to stop training for climbing. Here are some tips for training at home on a hangboard.
Hangboarding 101
A hangboard is the most effective way to train for climbing at home. If you don’t already have one, there are lots of different premade hangboards available online. Pick a hangboard that has a variety of edges and grips. You want the holds to be challenging. Ideally the hangboard has several holds that you can just barely hang onto with your full body weight, and there should also be some holds that you can’t quite hang onto without unweighting yourself with a pulley.
Basic Setup
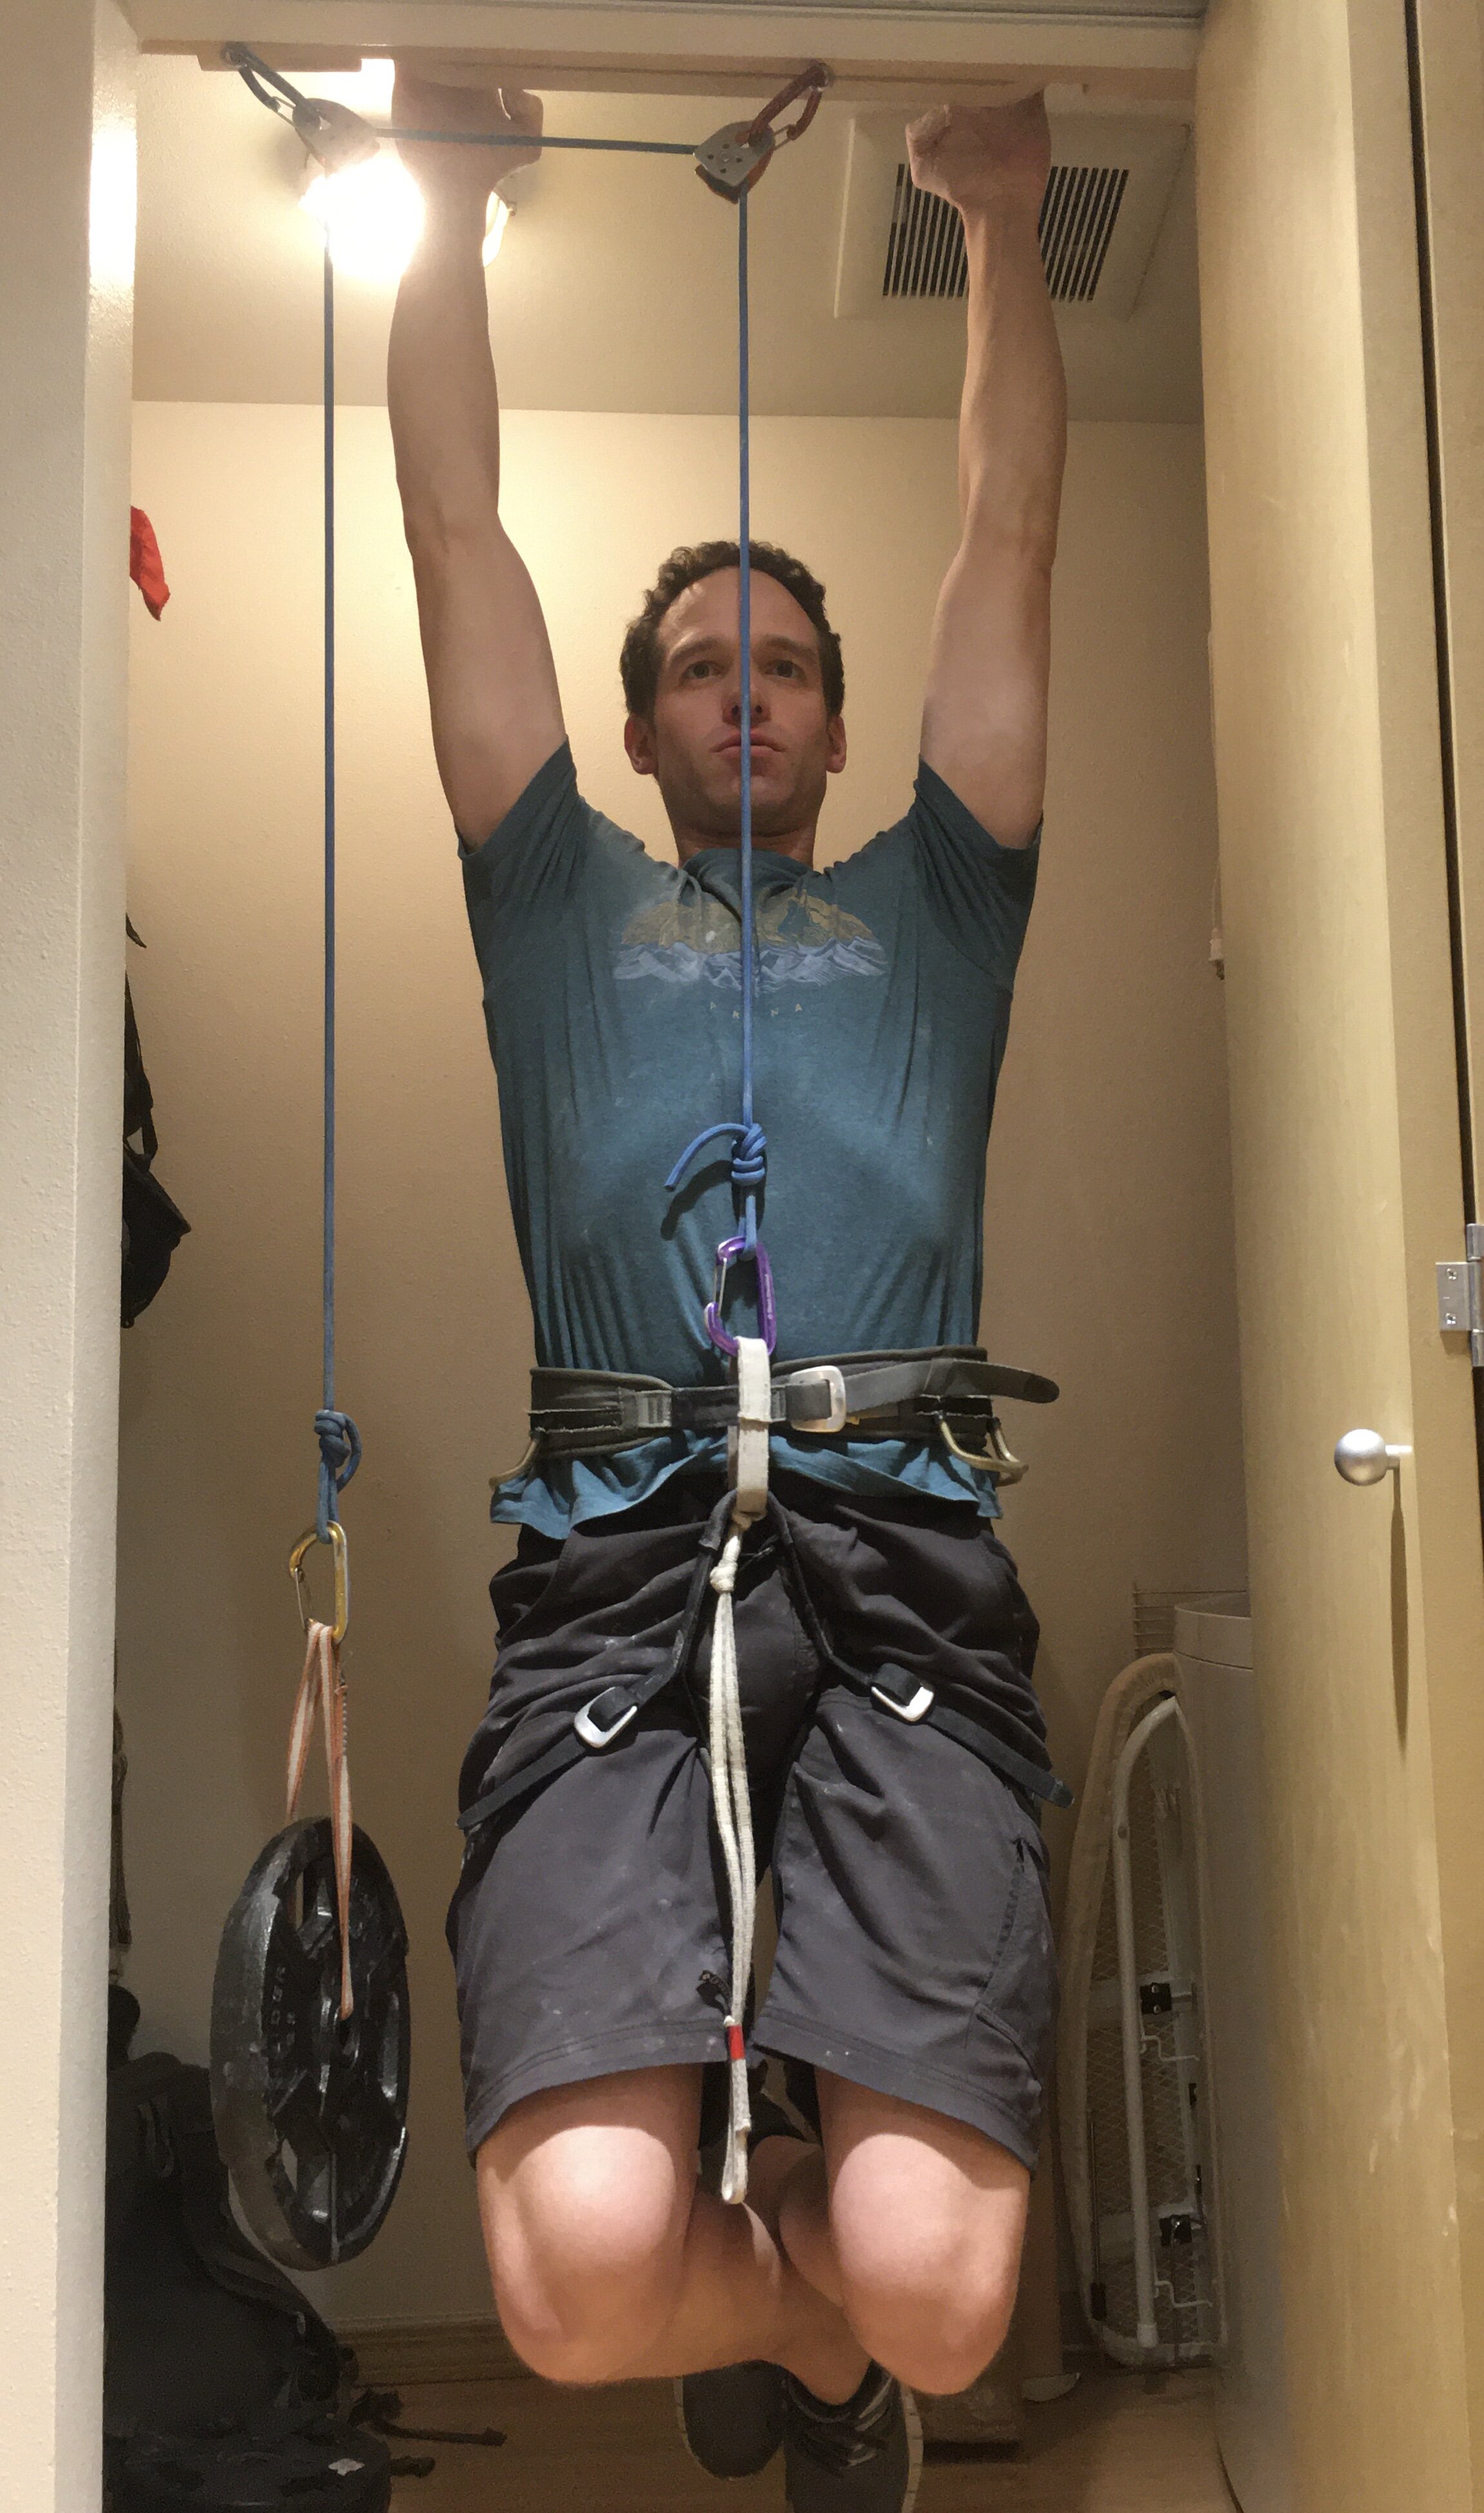
Install the hangboard over a doorframe or somewhere that you can hang freely. Typically you will mount the hangboard on a plywood mounting board which you can screw directly into the studs over the door frame. You’ll also want to add two pulleys underneath the hangboard to subtract weight when you hang. A cheap crevasse rescue pulley works fine attached with a carabiner, and you can use eye bolts to attach the pulley/carabiner to the underside of the hangboard.
Hangboard Setup
Basic Hangboard Technique: The Dead-Hang
The most basic type of hangboard training that uses your body weight is the dead-hang. With the dead-hang, you’re not trying to do a pull-up on the hangboard. You are simply trying to hang onto the hangboard for a short period of time. You should hang with engaged shoulder blades, meaning that there should be some room between your shoulders and your ears (don’t hang limp). Your elbows should be engaged too with the arm straight or slightly bent. Now pick an edge that is hard to hang on. Try to add weight to your harness or subtract weight through the pulleys so that you are near failure when you hang.
Hangboard Protocols
There are a few different dead hang protocols that most climbers use. The “max hang” protocol is the simplest. It involves adding the maximum weight or subtracting the minimum weight that you can tolerate for a 10 second hang. Hang for 10 seconds and then recover for 3 minutes. Repeat this for 6-10 sets on different edges and grips. Max hangs are good for building overall strength.
Another popular protocol uses “repeaters.” Begin by adding or subtracting weight to your harness so you are near failure at the end. With repeaters, you do a timed hang followed by a brief rest, and you repeat this for several repetitions. The most common repeater timing is a 7 second hang followed by a 3 second rest repeated 6 times (this will add up to a minute of hangs and rests). Take a 3 minute recovery after doing repeaters, and then complete several more sets on different holds/grips. Repeaters help build strength, but also challenge your endurance a little bit too.
Grips
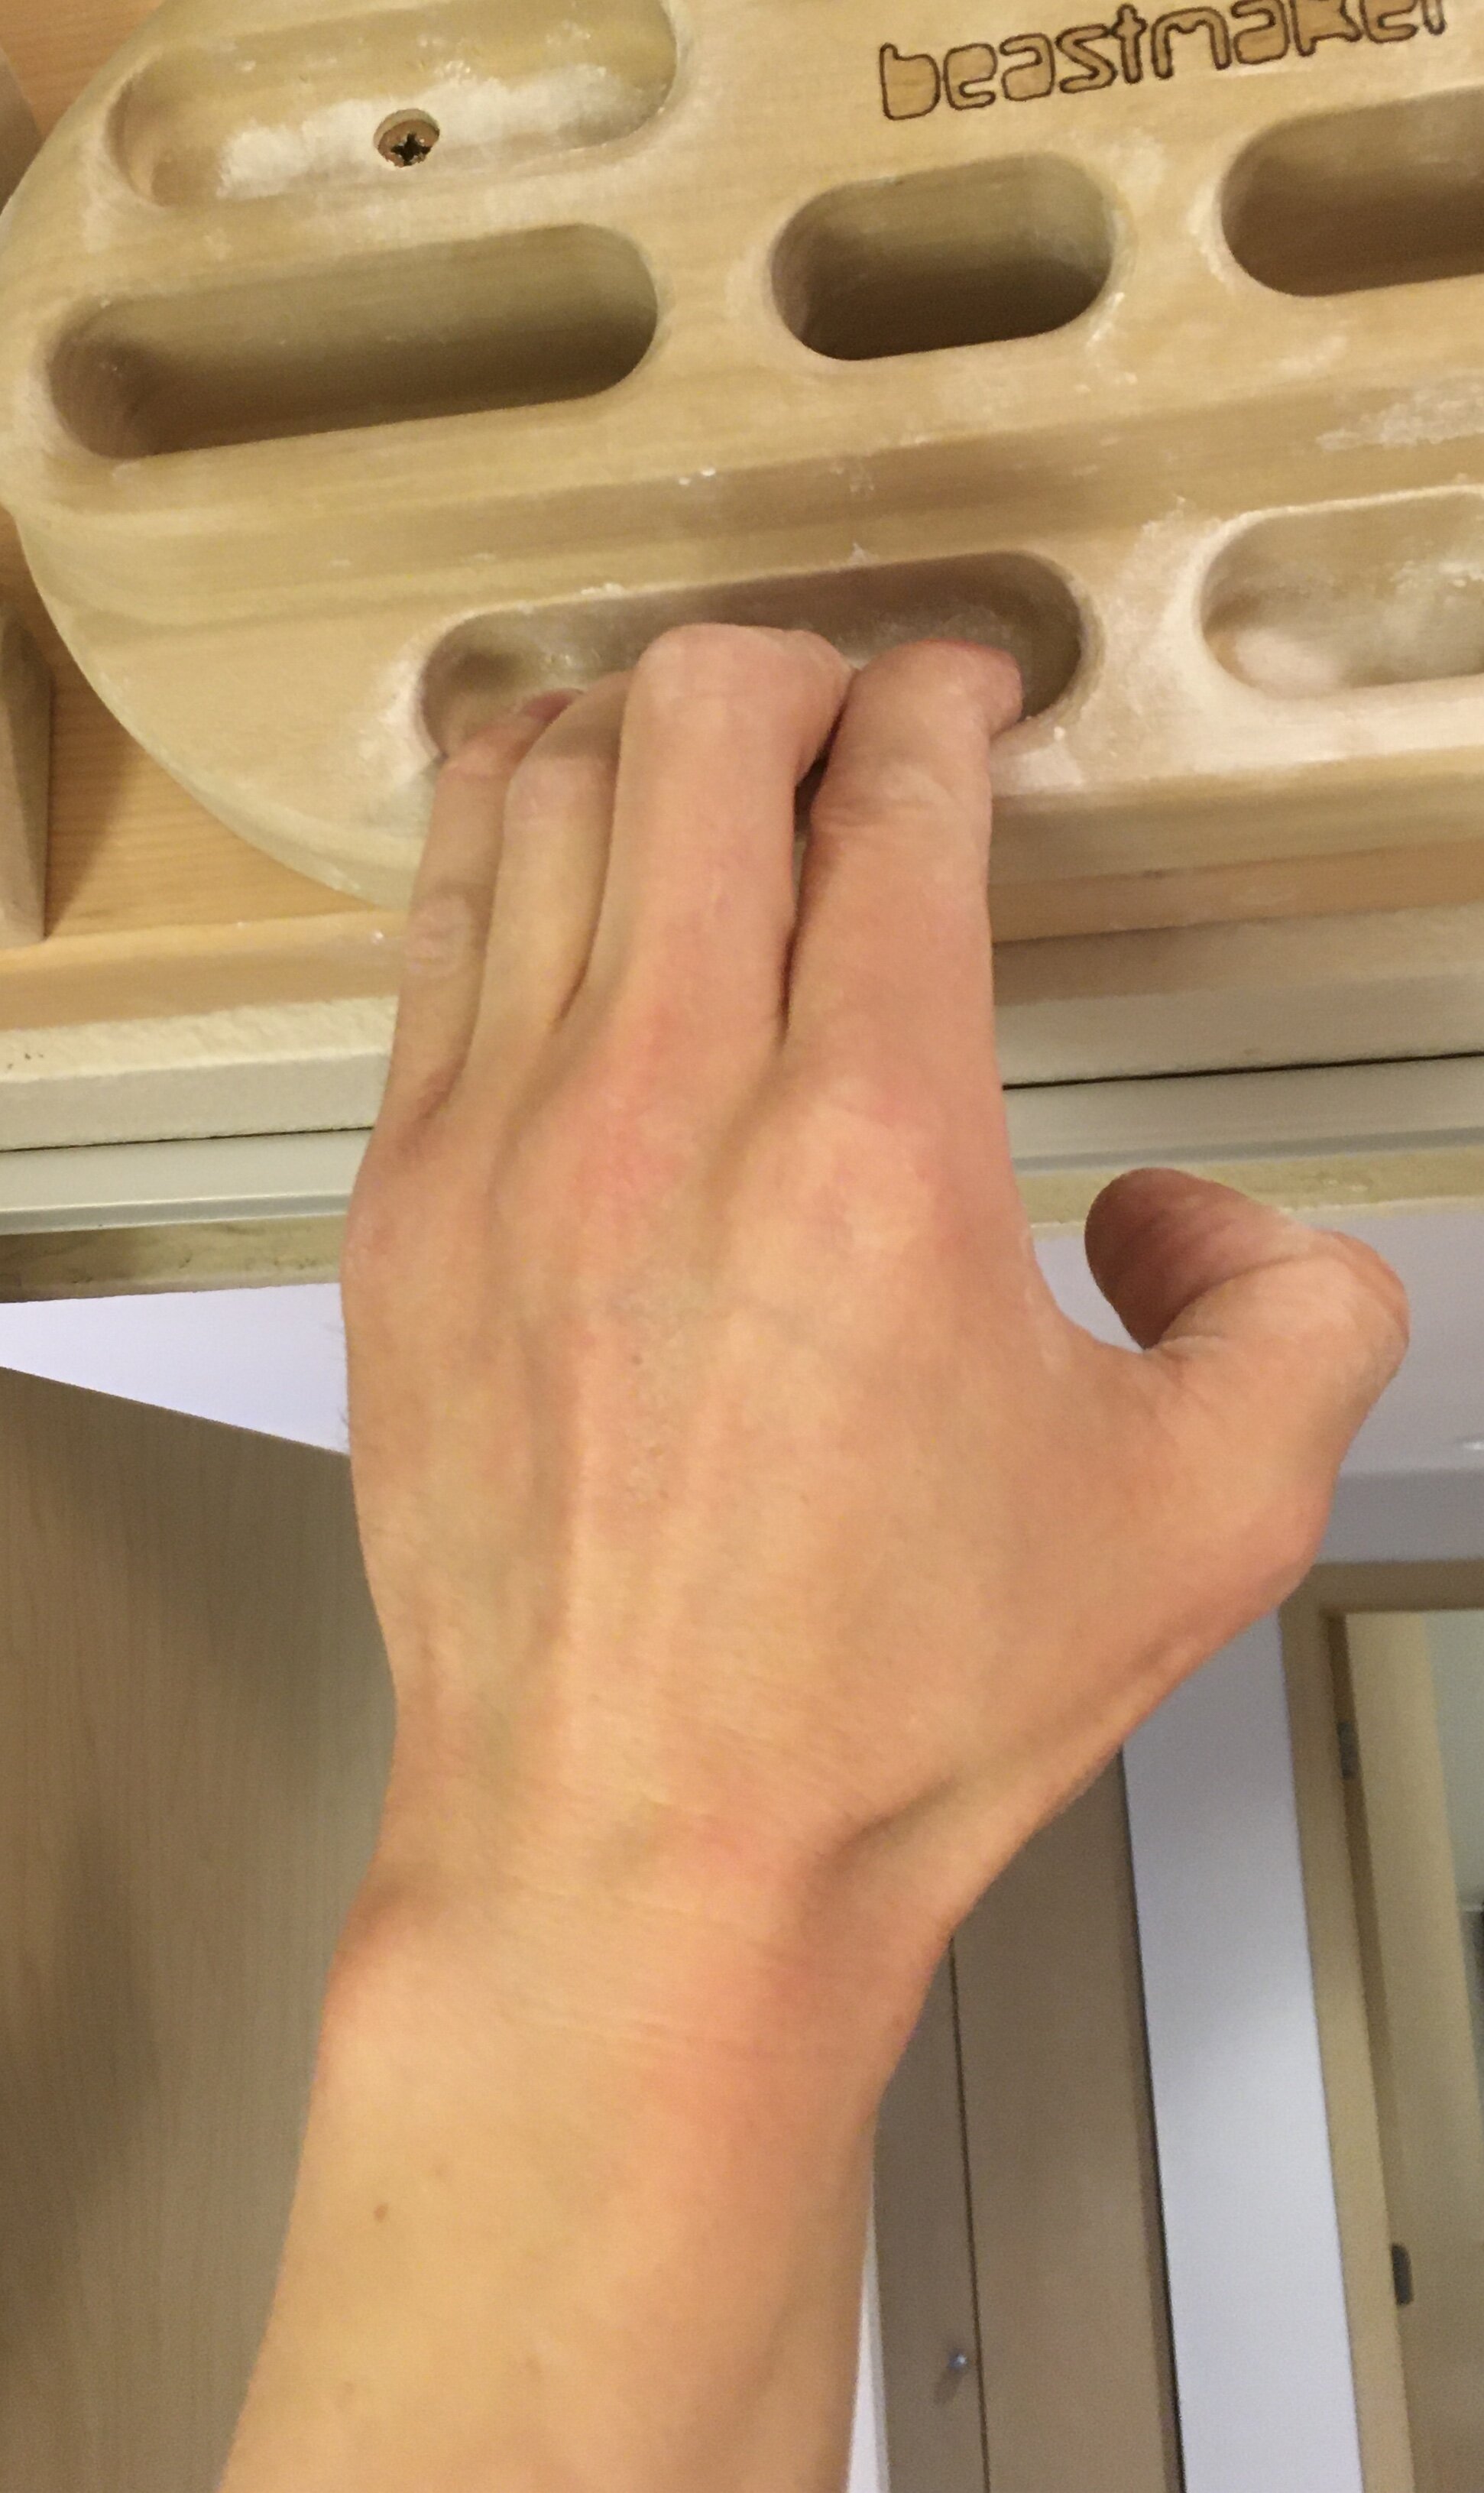
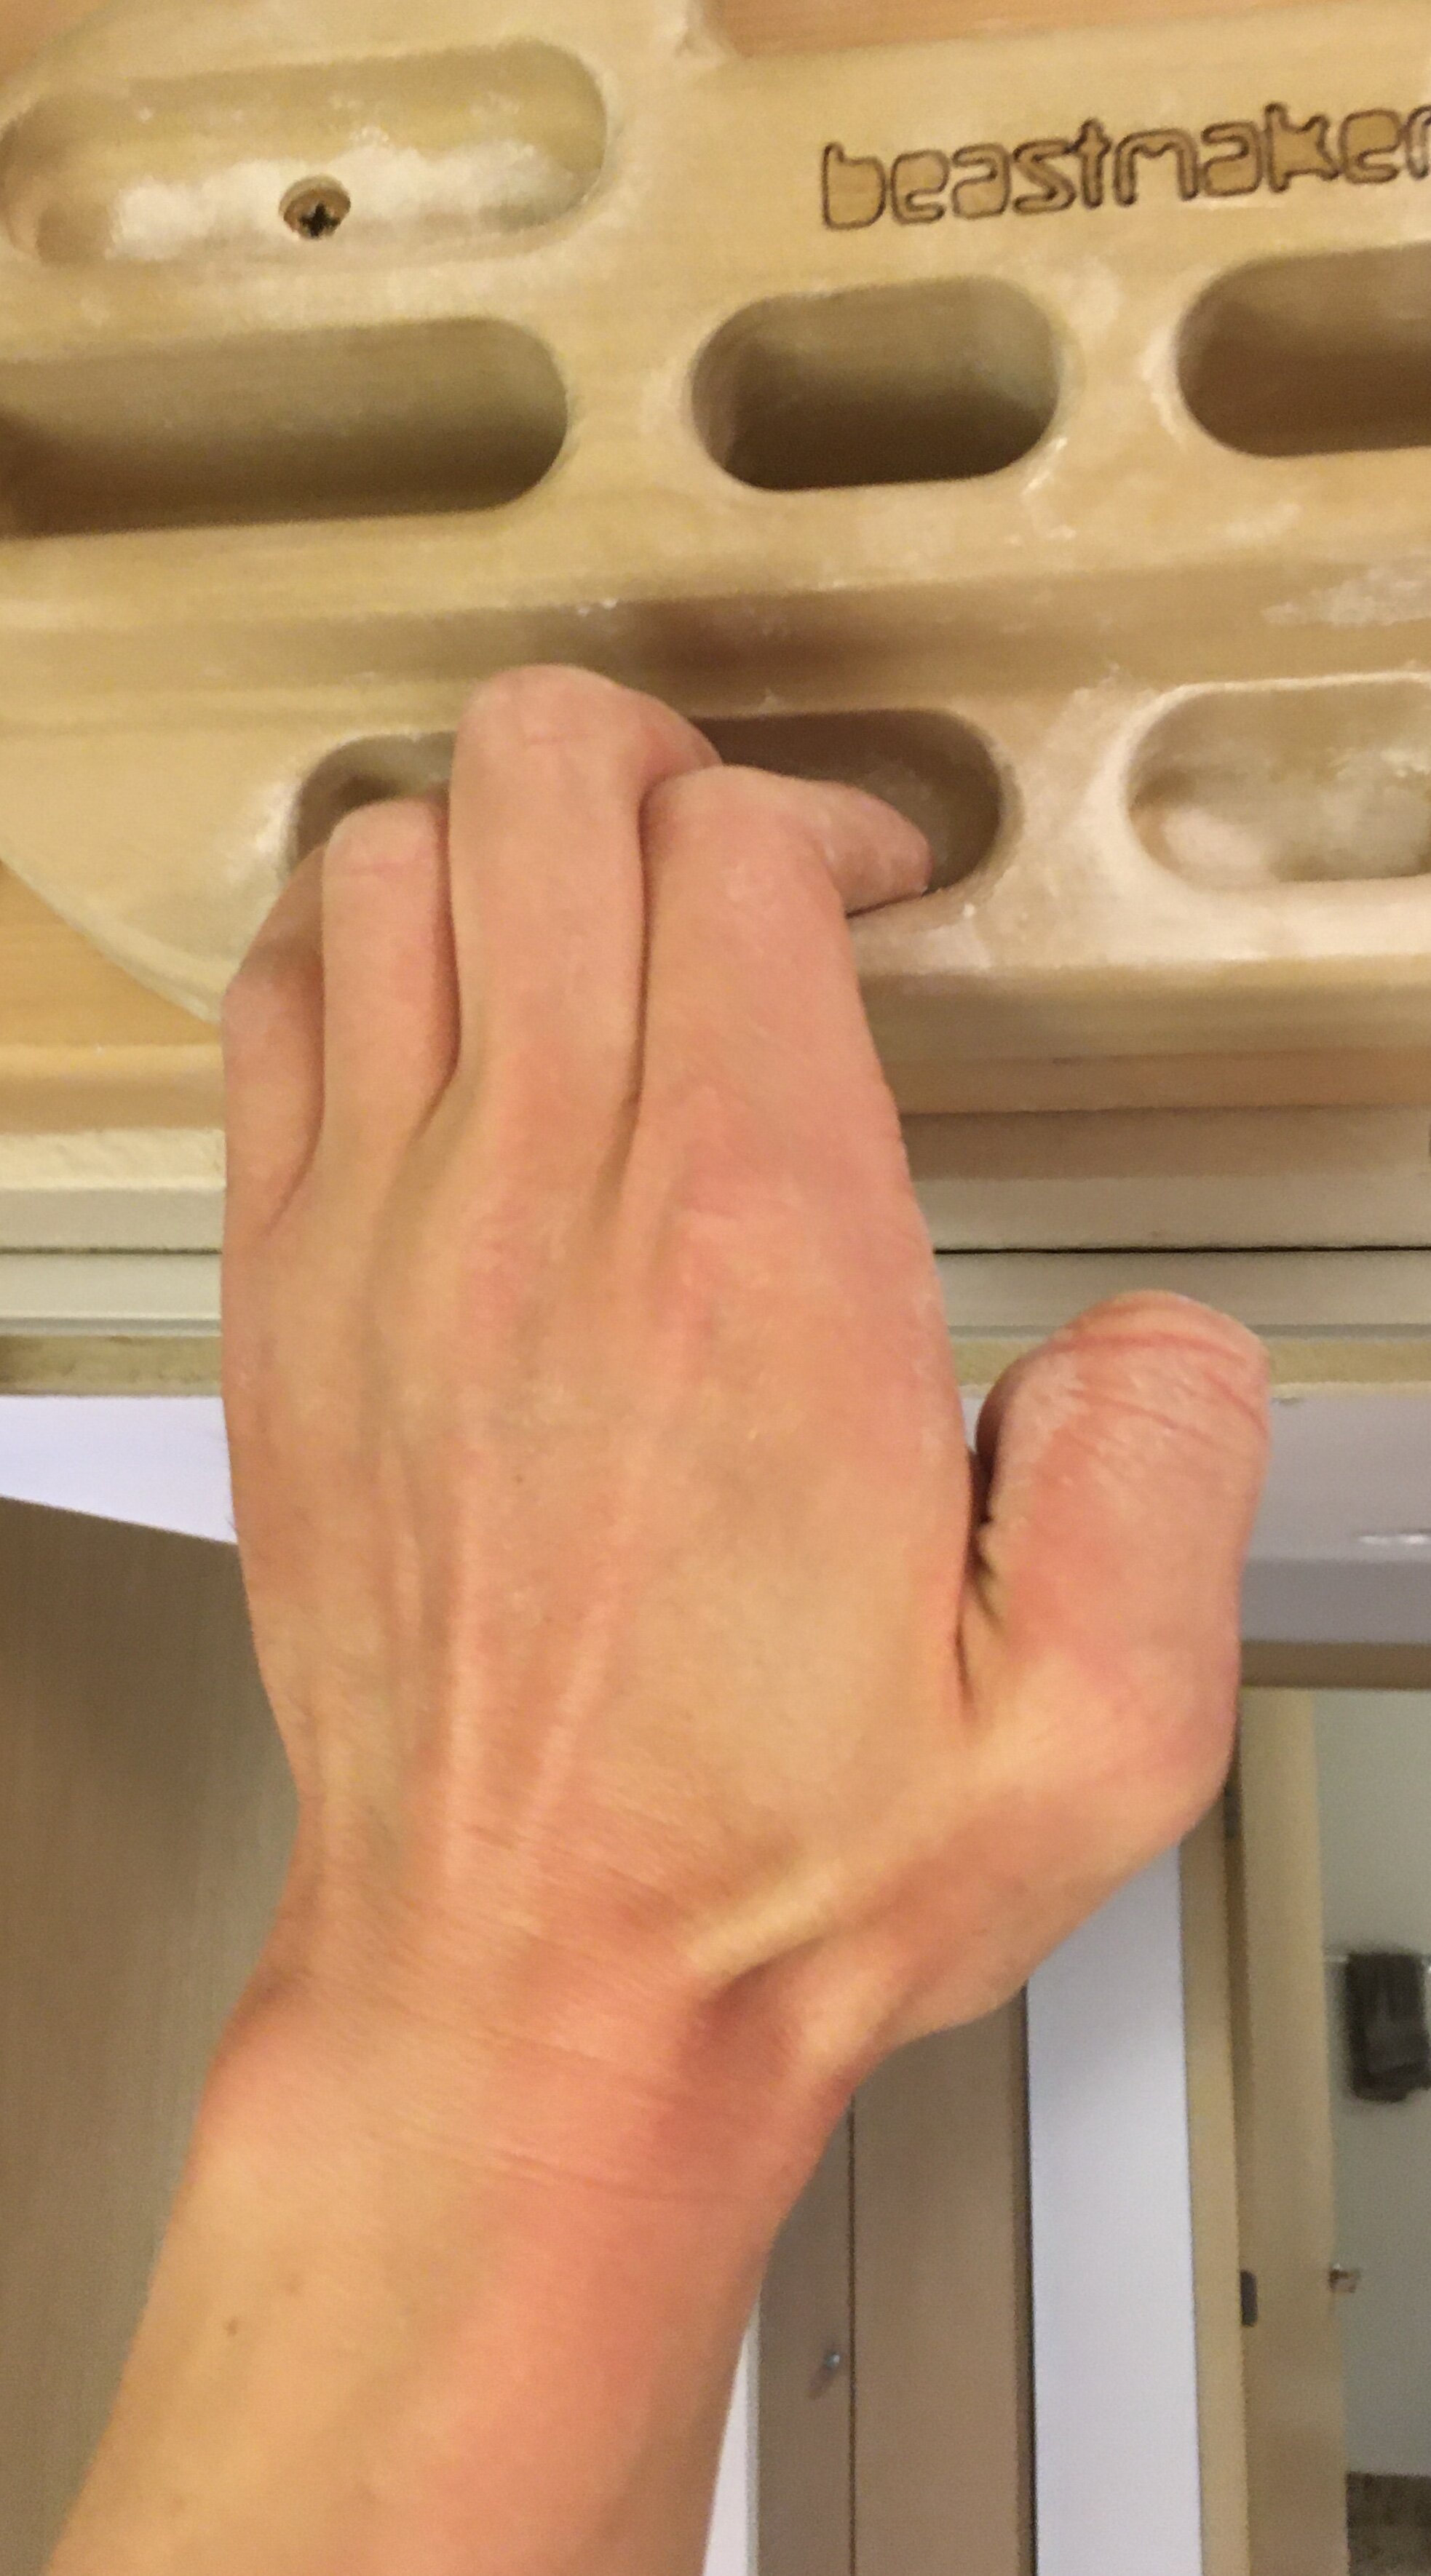
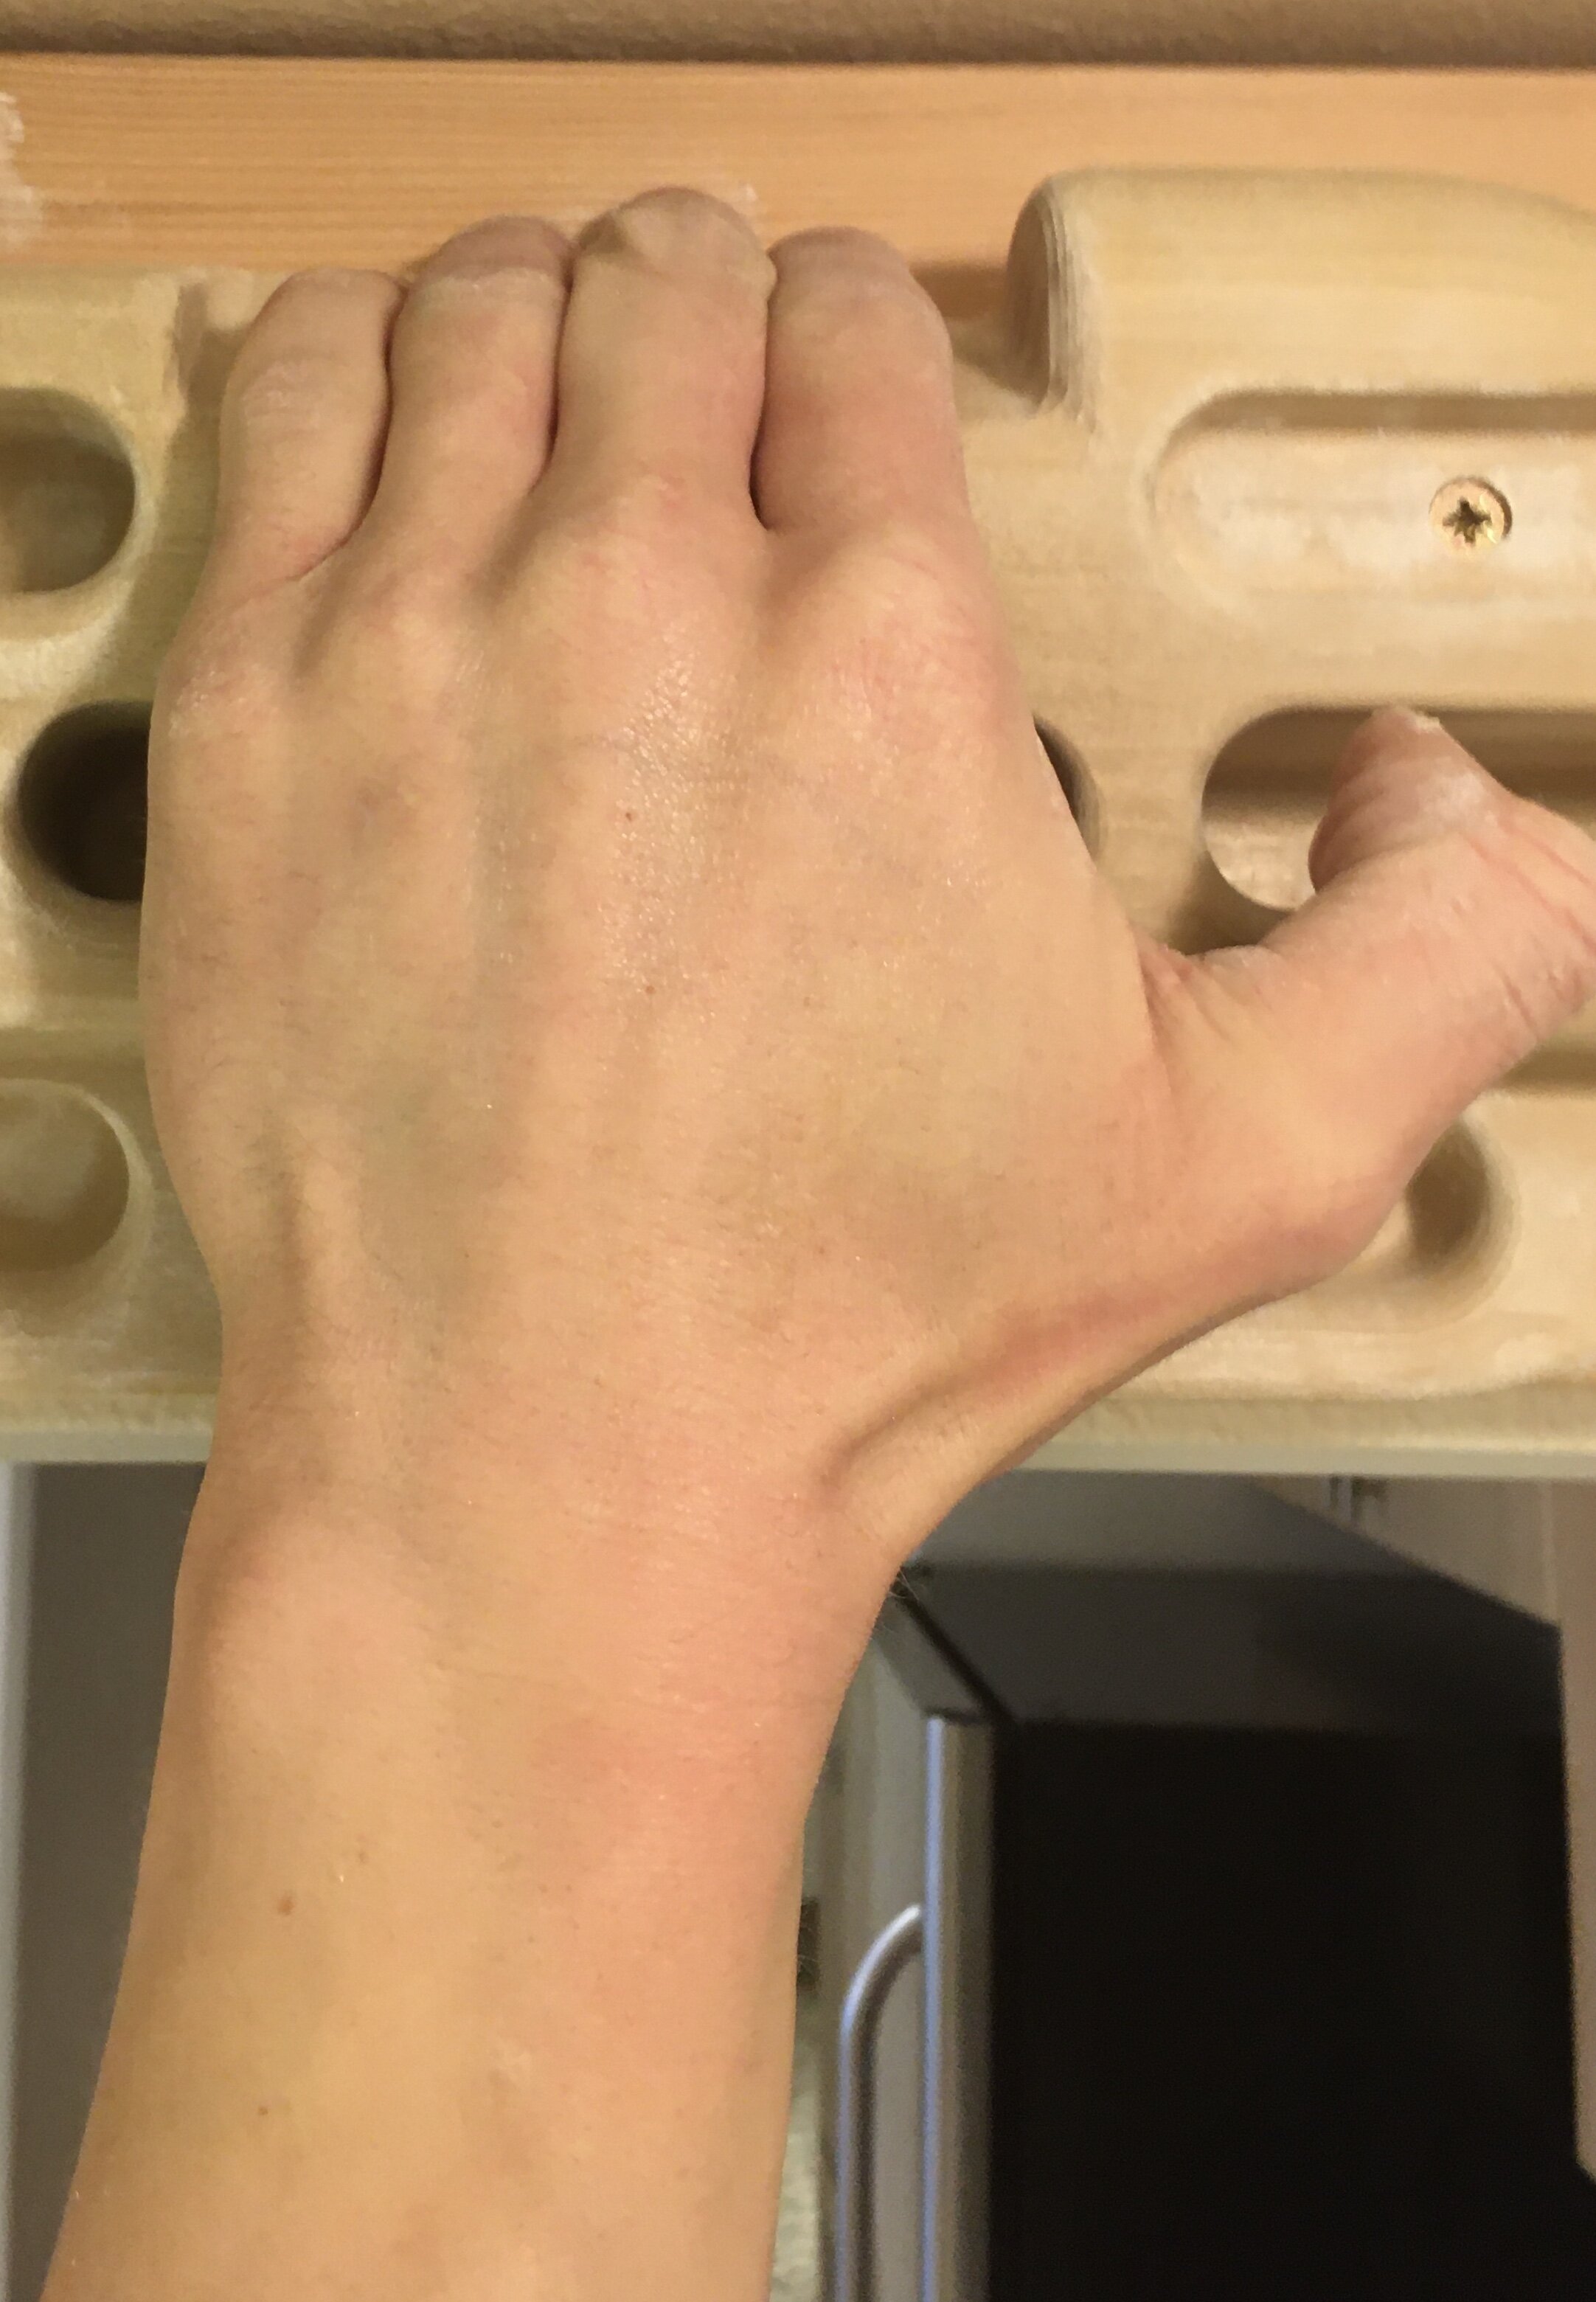
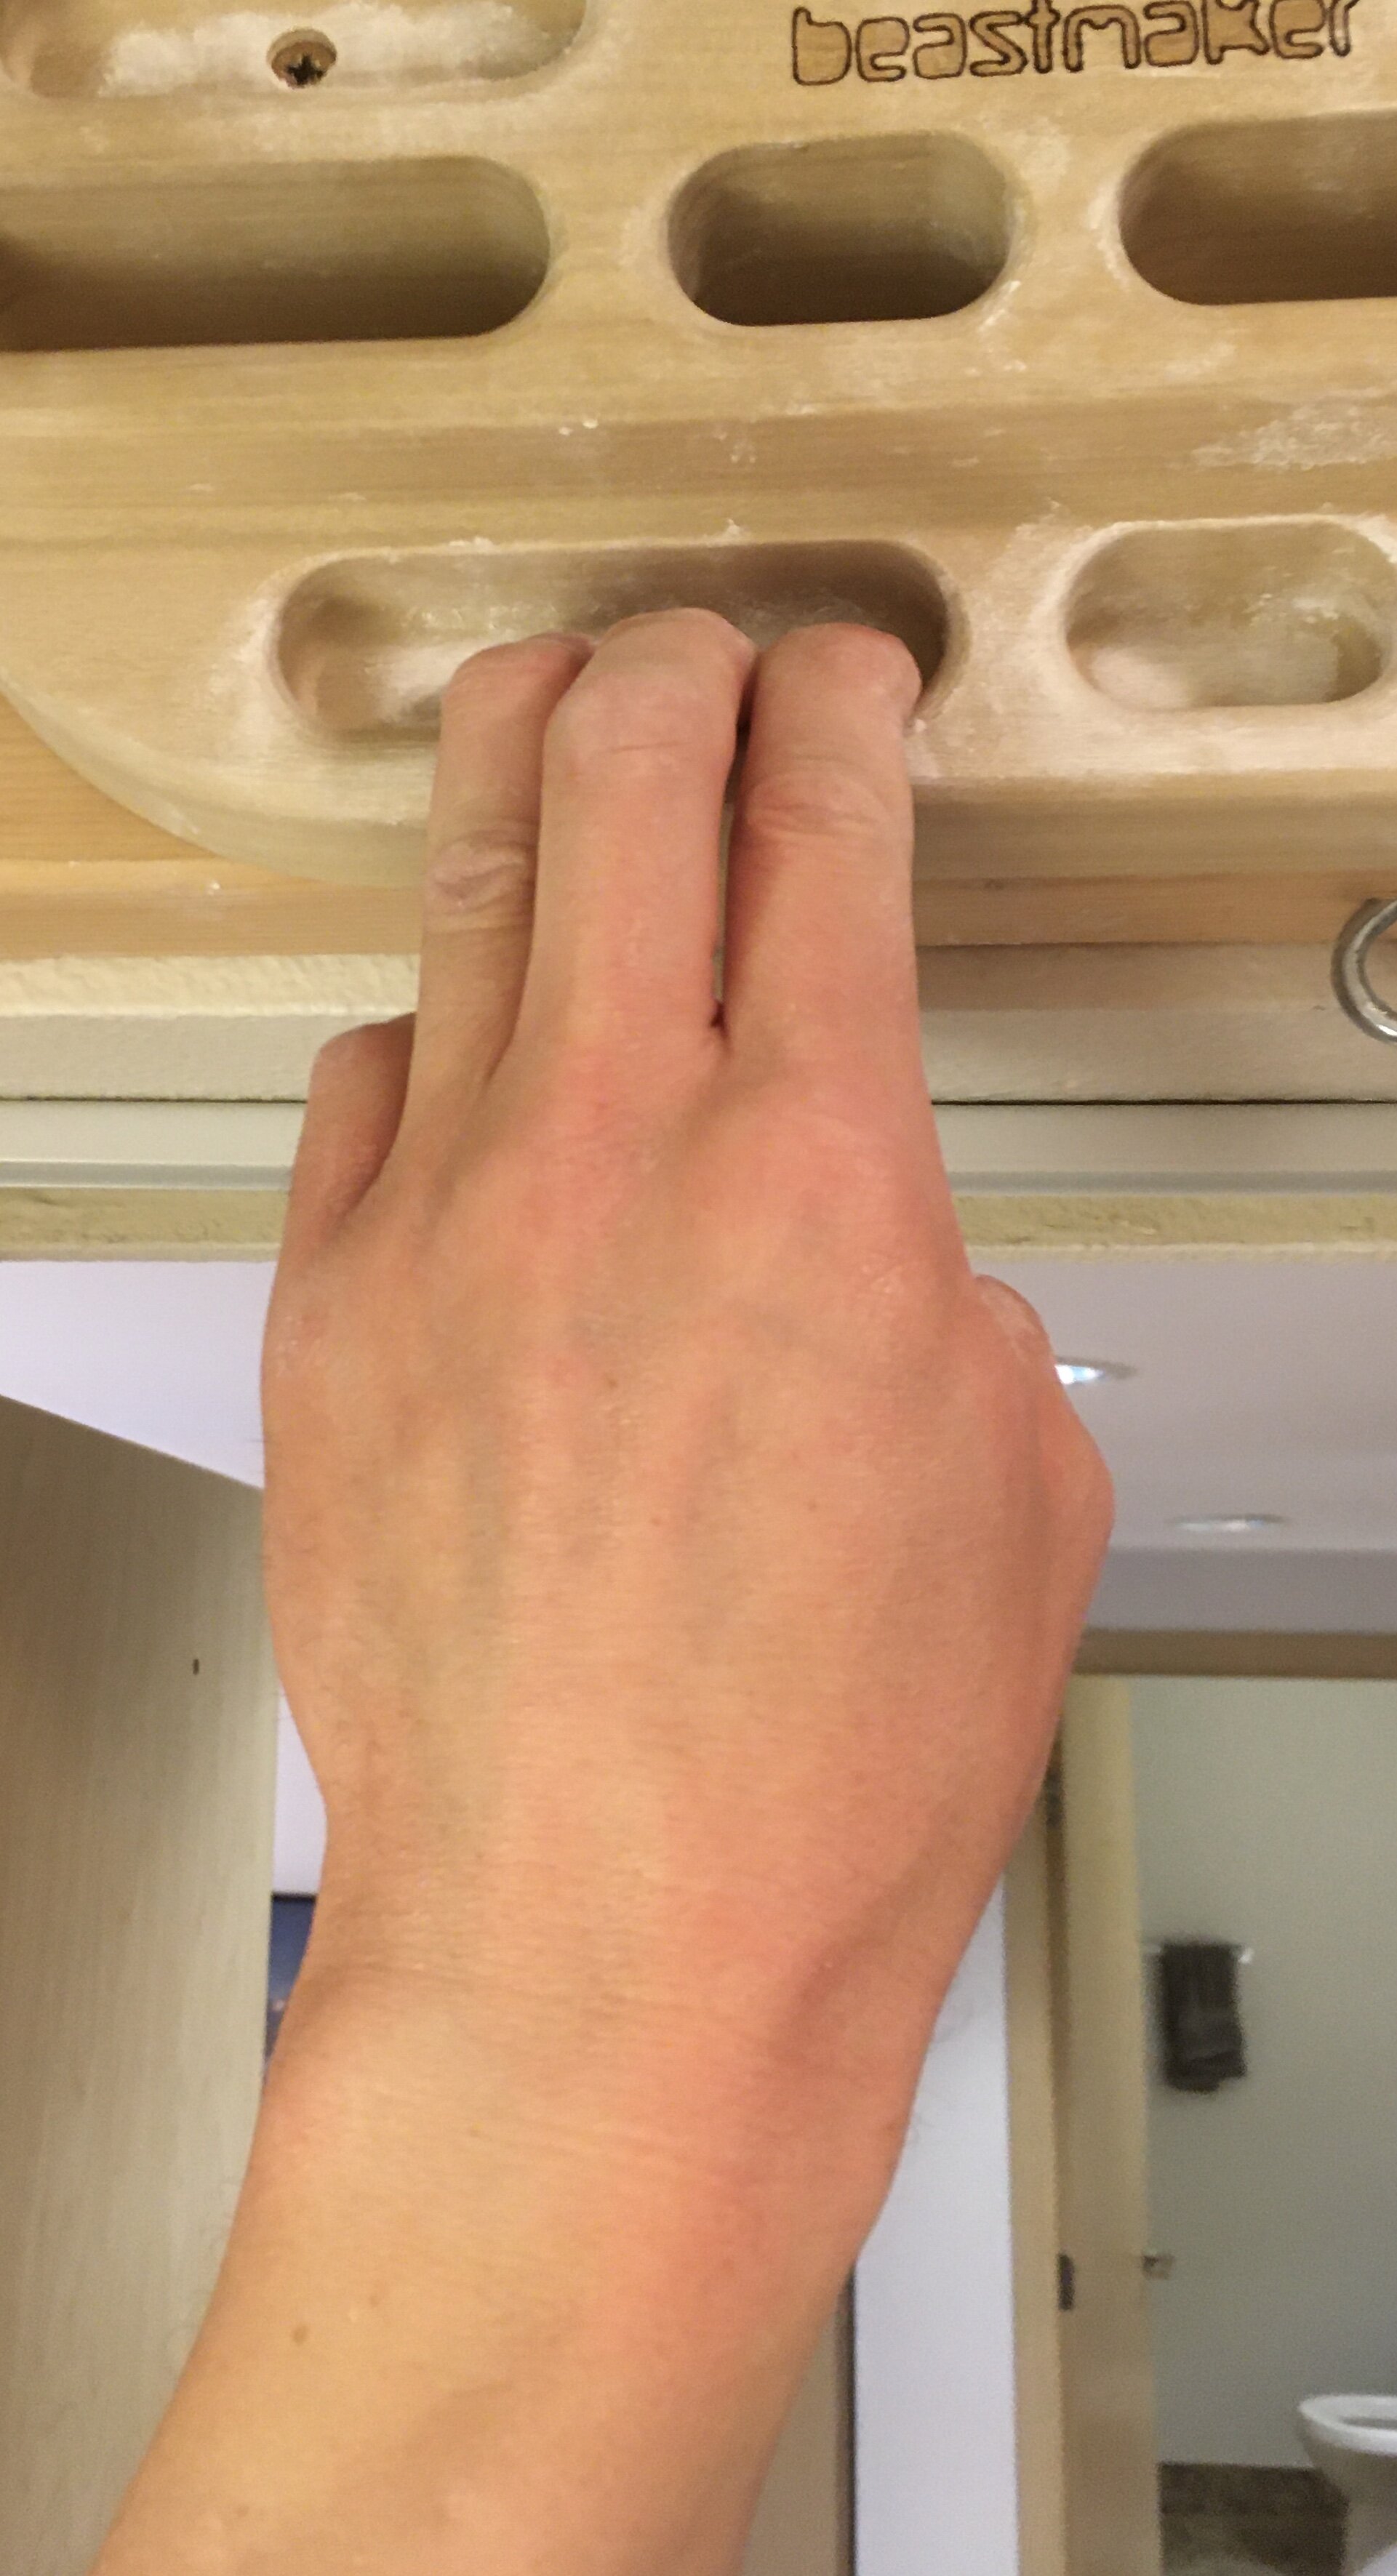
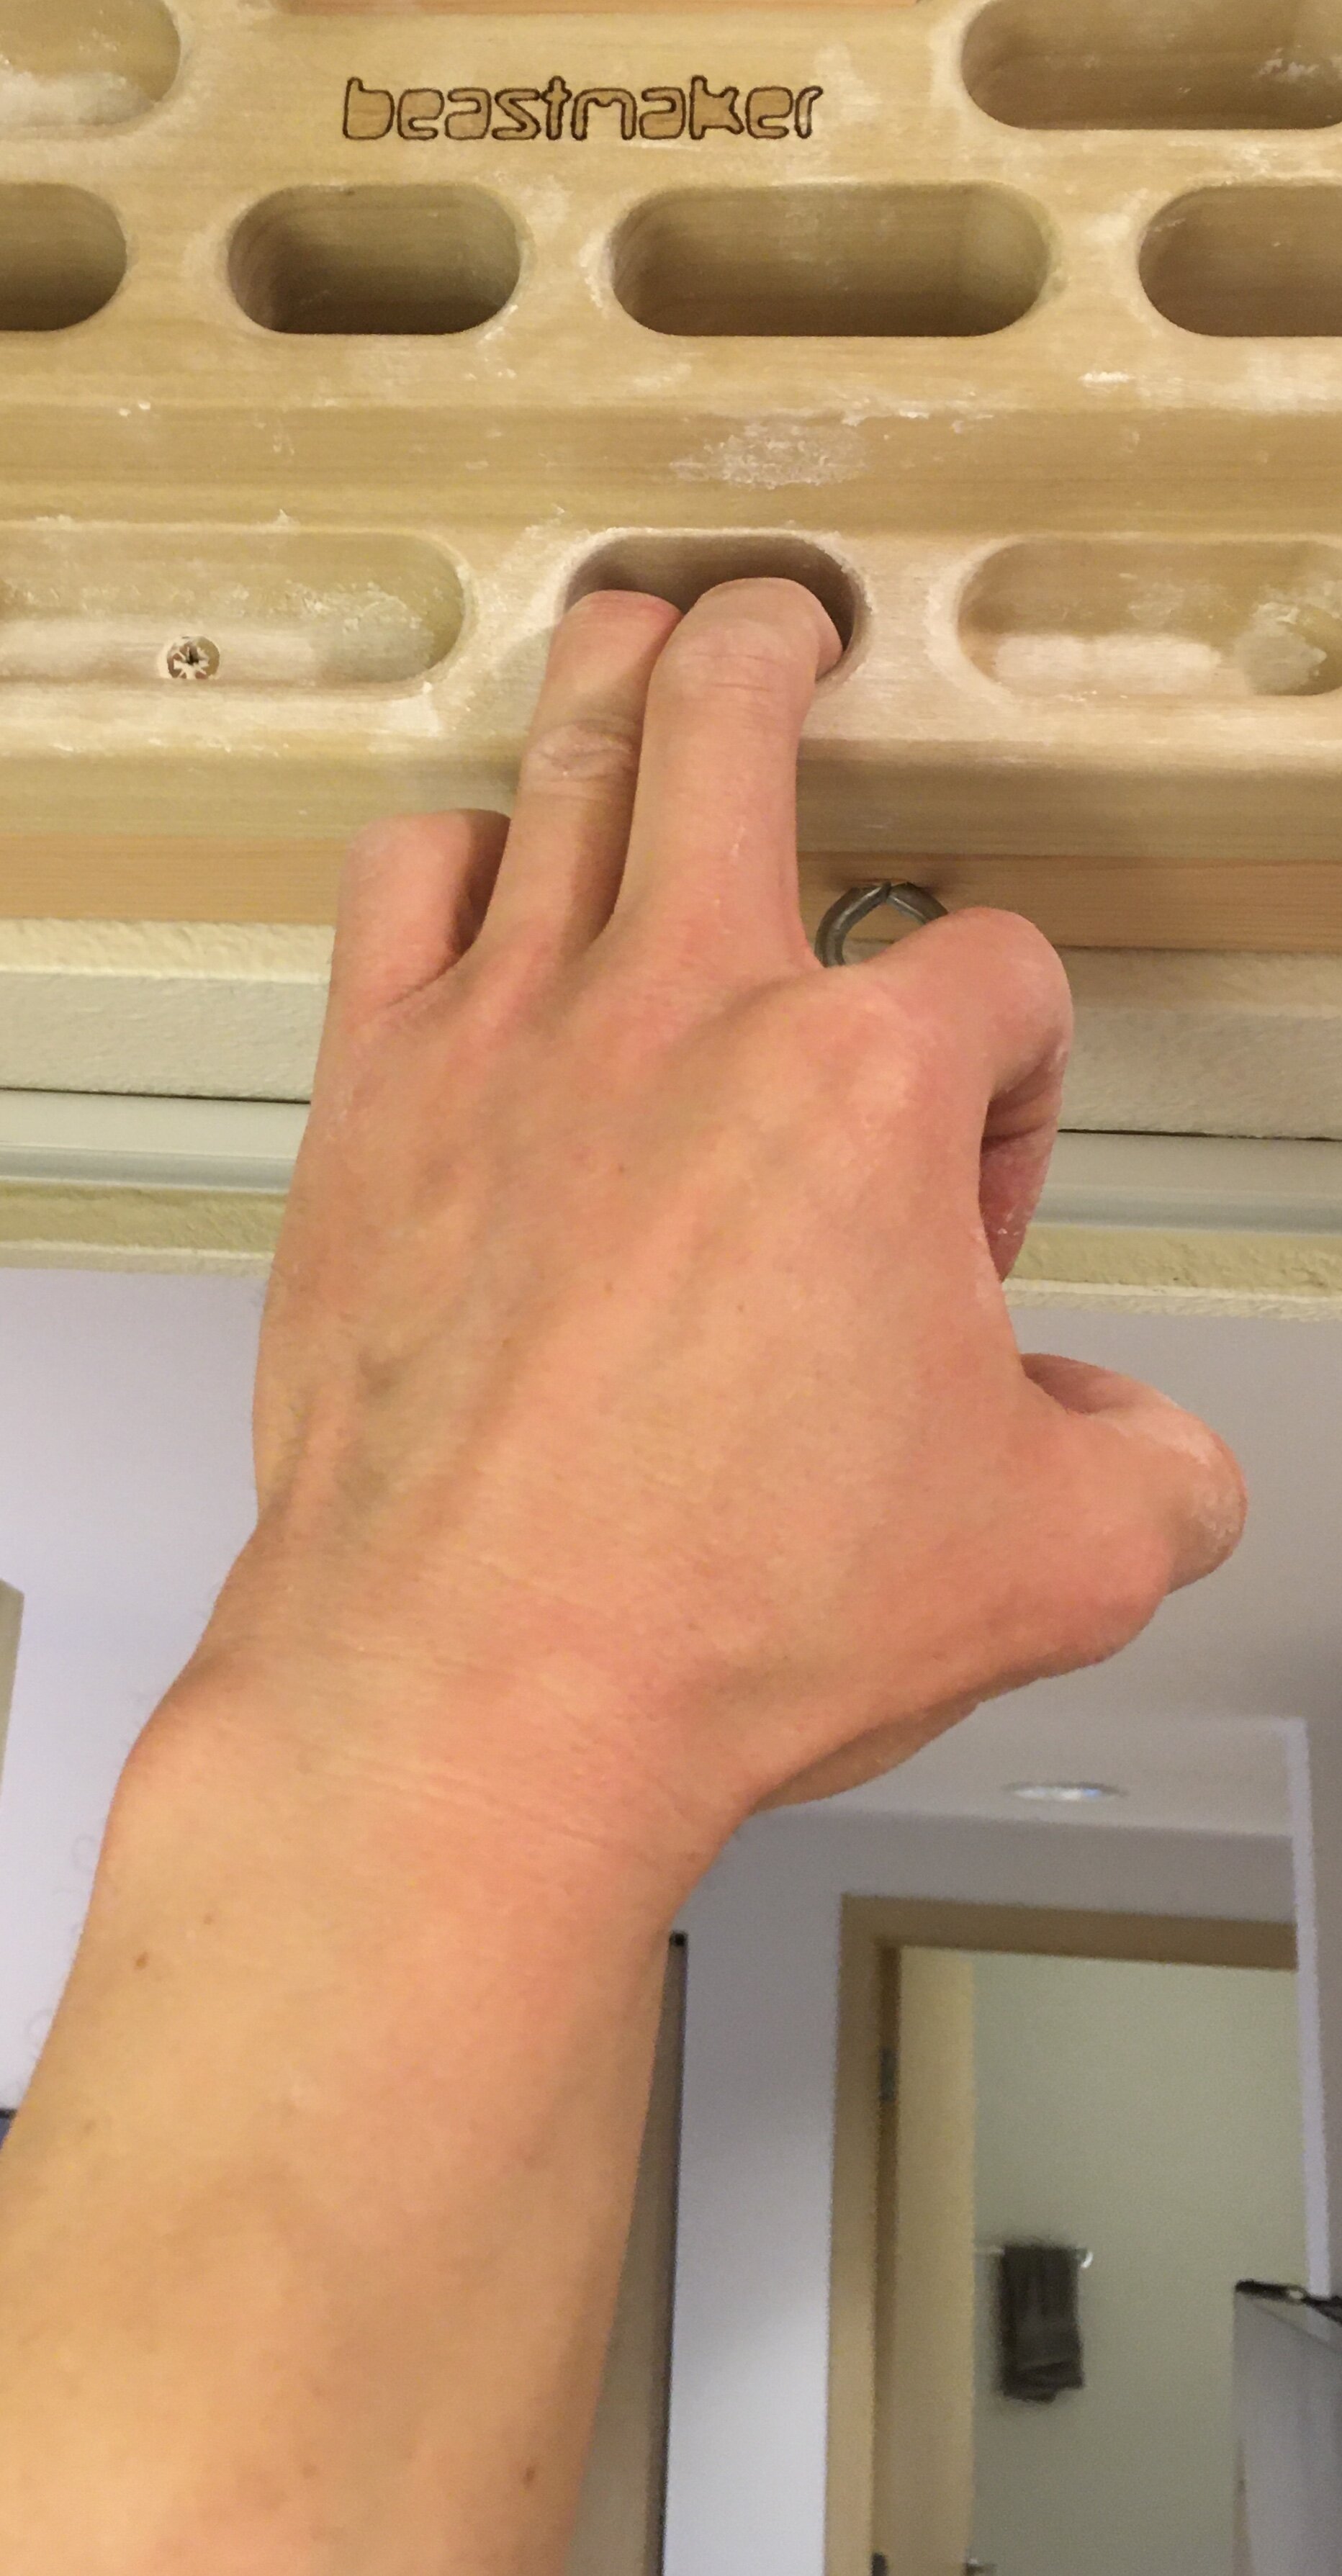
As you hang you’ll want to train different grips (pictured below). The most important grips to train are the open handed grip and the half crimp. The open handed grip is the least stressful on your fingers. The half crimp is a little more stressful, so progress the load on this gradually. It is generally recommended to avoid training a full-crimp position, which is like the half-crimp position but the thumb wraps over the index finger. Also experiment with slopers, 3 finger grips, 2 finger grips, and 1 finger grips. Some hangboards allow you to train a pinch (not pictured) which is a grip that involves the thumb.
Other Training Ideas
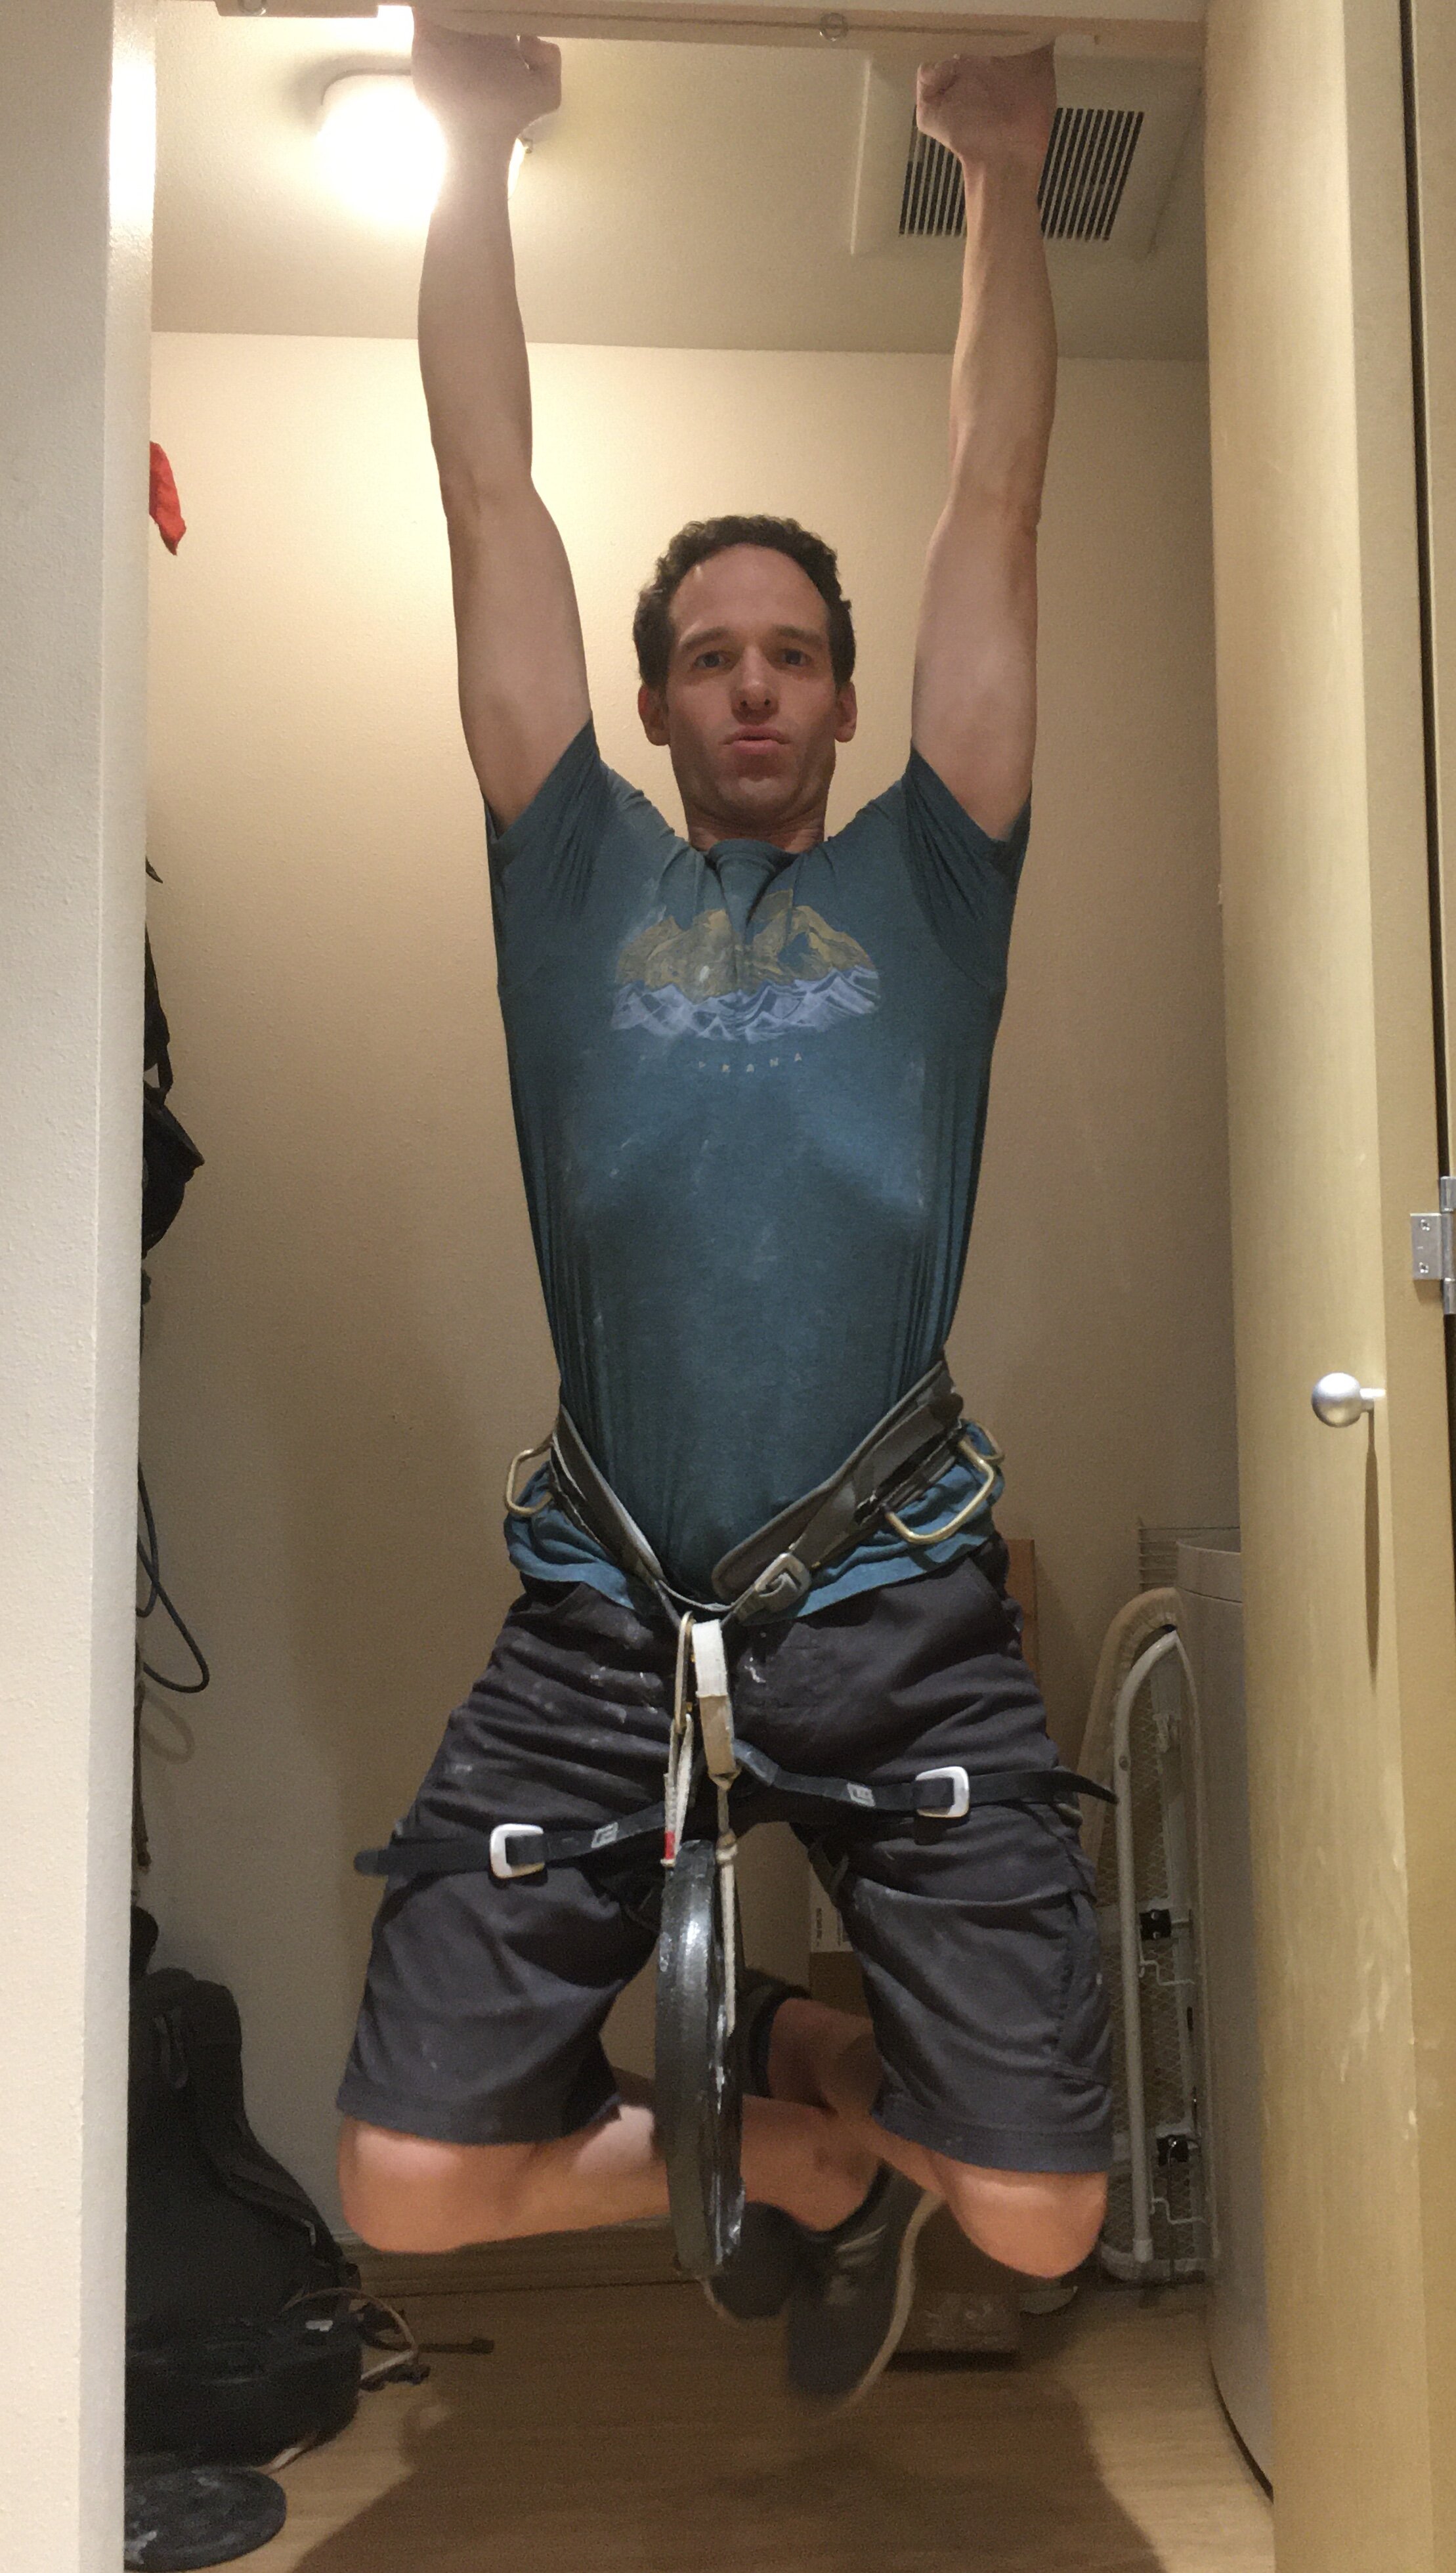
Getting bored with dead-hangs? There are lots of other things you can train on a hangboard. Try training a pull-up, knee raises, straight leg raises, toes-to-bar, front levers, one arm dead hangs, and one arm pull-ups. As always you can add or subtract weight as needed.
Important Tips
It takes muscles a few months to start getting stronger, but it takes years for the tendons and connective tissues of your fingers to start adapting to training. It’s very important to be gradual the first year you hangboard to avoid overuse injuries. Be sure to keep a training log to track the weights you are using. You will begin to see improvements in your strength over time.
Also never forget to warm up before you hangboard. At home, you can spend 10 minutes doing sub-maximal hangs and pull-ups to get your fingers and shoulders warmed up.
Most importantly, keep your workouts fun so you stick with it. With consistent work you might find that you are a stronger climber when the crags and gyms open up again. Good luck!
References
Anderson ML, Anderson ML. The Rock Climber’s Training Manual: A Guide to Continuous Improvement. Boulder, CO: Fixed Pin Publishing; 2014.
Horst EJ. Training for Climbing: The Definitive Guide to Improving Your Climbing Performance. Guilford, CT: Falcon Guides; 2002
Pincus M. Comparing Hangboard Protocols. Training Beta Website.
https://www.trainingbeta.com/comparing-hangboard-protocols/. Published January 5th, 2018. Accessed April 17th, 2020.


